
logoopclwall
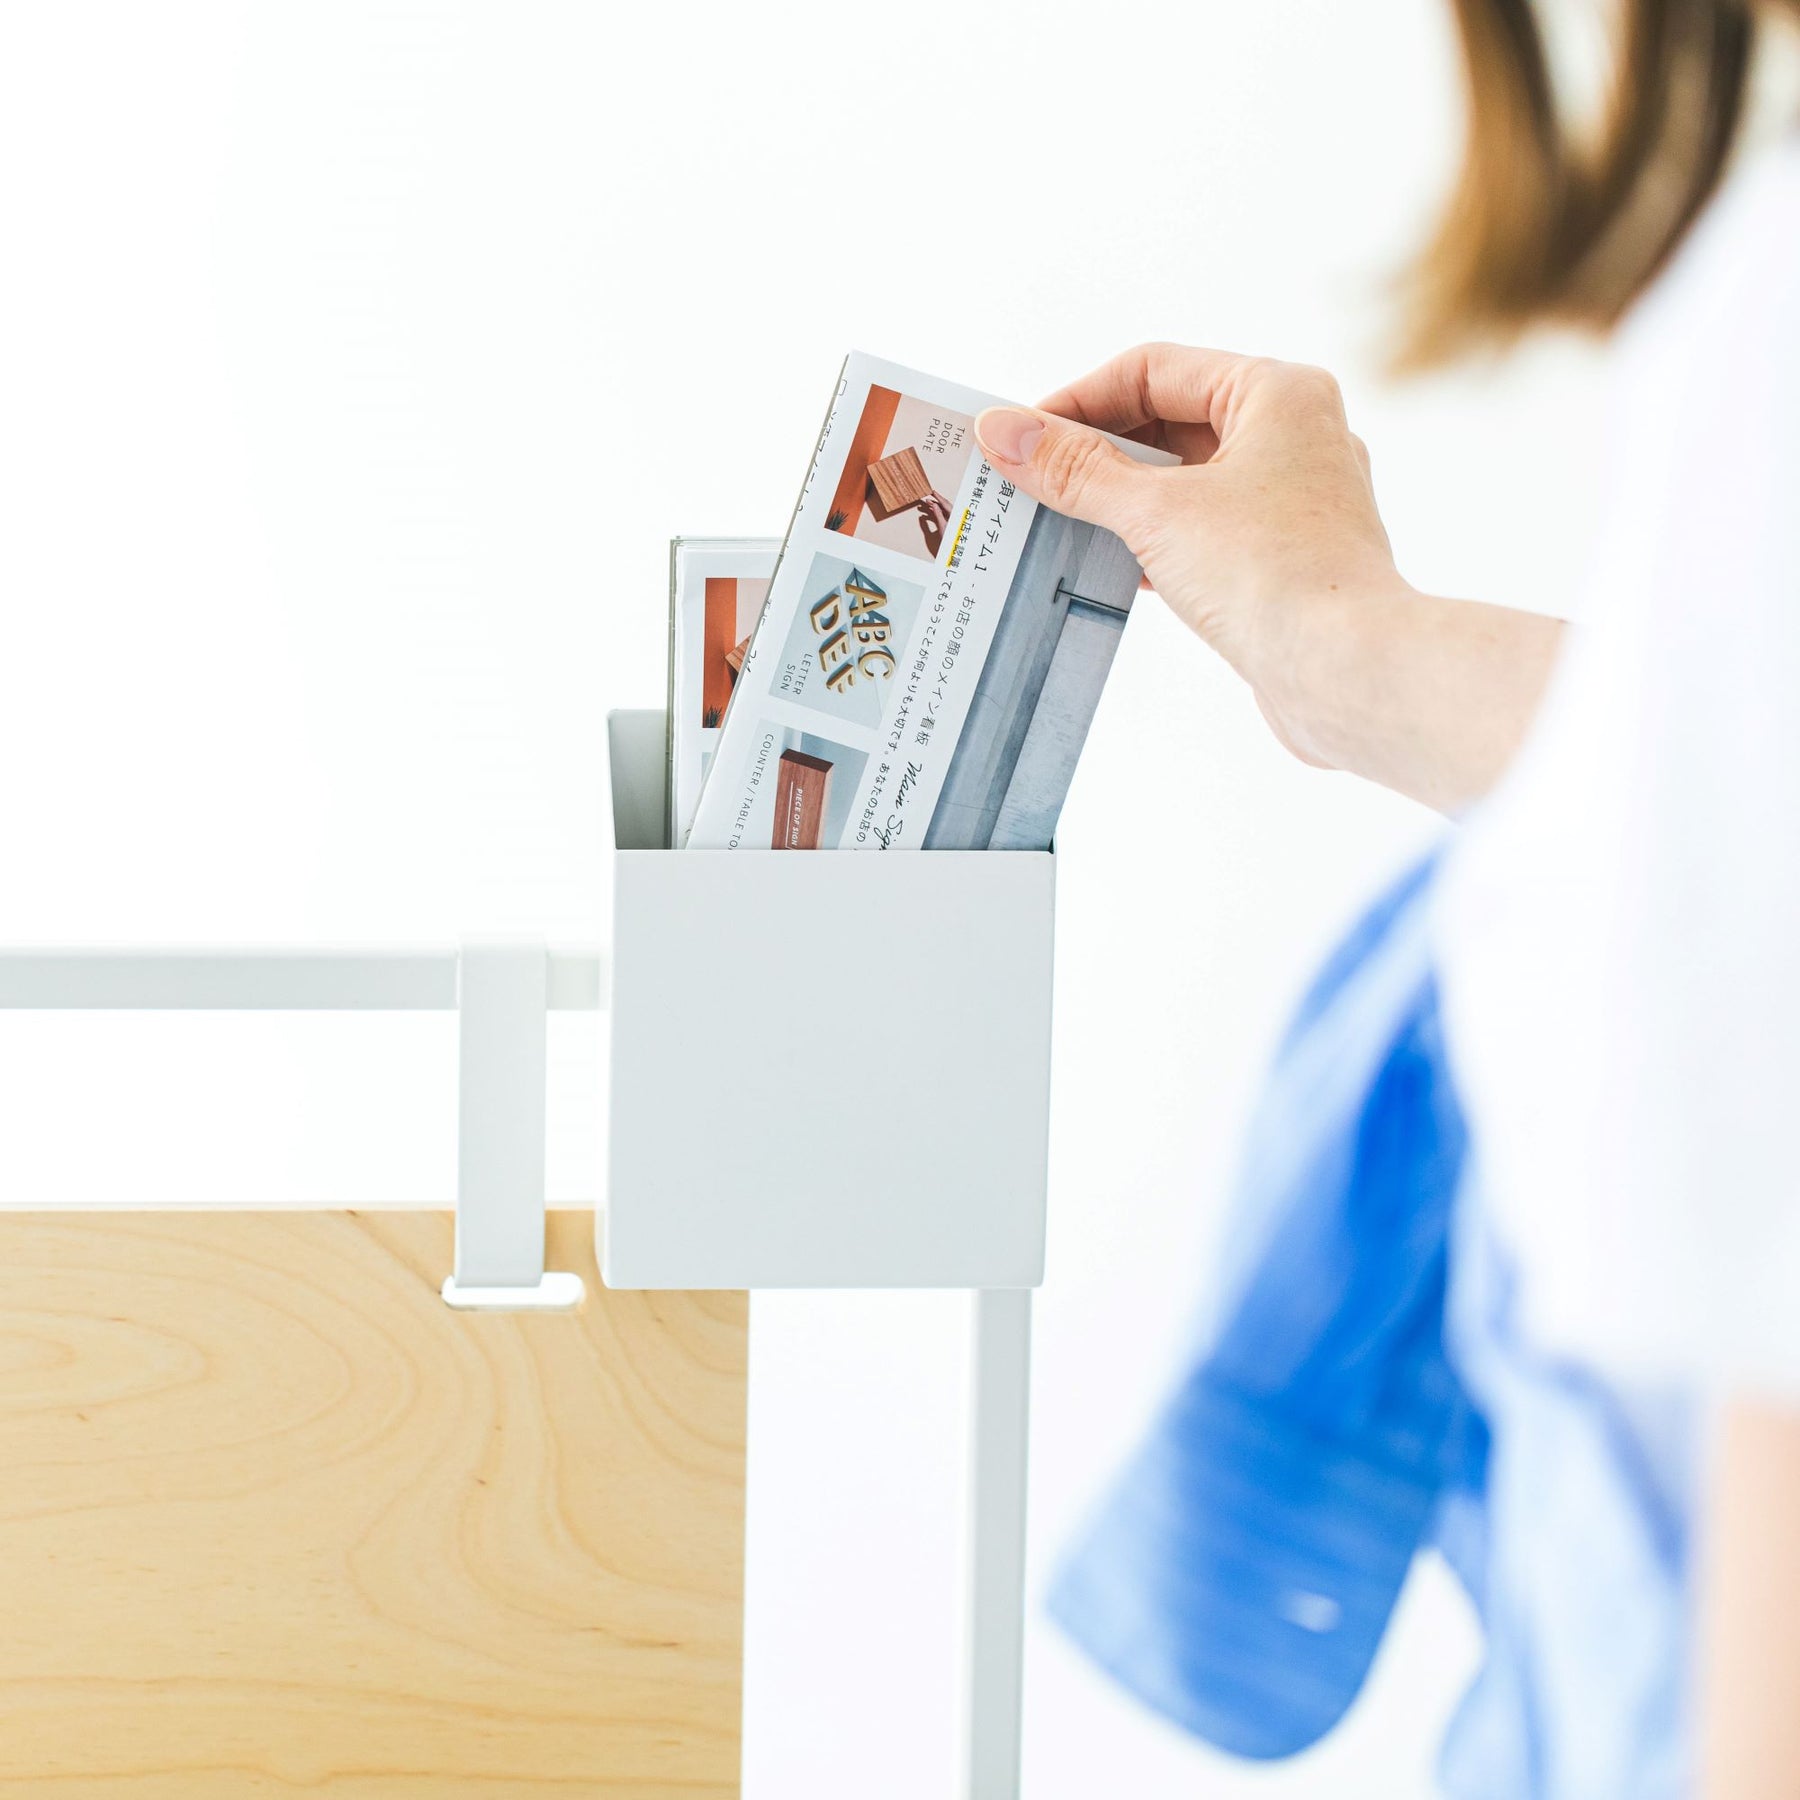
This product can be installed using either a combination of double-sided tape and adhesive, or screws.
[For Customers]
To ensure safe use, we recommend performing a periodic maintenance inspection at least once a year. Long-term use may cause degradation over time or loosening of bolts and screws. To prevent accidents, please conduct regular maintenance checks. If any issues are found, repair or replace the components.
* Ensure installation is done on a wall with proper solid backing/studs.
* For drywall, securely attach to the underlying studs behind the wall.
* For concrete walls, drill pilot holes and use concrete plugs/anchors for installation.
* Wall conditions vary. Please ensure a sufficiently strong installation method based on your wall type.
* If installing on an exterior wall, verify the wall material and ensure proper waterproofing treatment.
* If the sign protrudes into a public road/street, prior application and approval from the relevant road authority are required.
⚠️ If you have any concerns about the above installation conditions or process, please do not hesitate to consult a professional contractor.
SET CONTENTS
- Rails ×3
- Large Plate (Logo) ×1
- Small Plate (OPEN / CLOSE) ×1 (Double-sided print)
- Rail Mounting Screws ×6
- Double-sided Tape ×3 strips + Adhesive
HOW TO ASSEMBLE
1. Determine the installation position
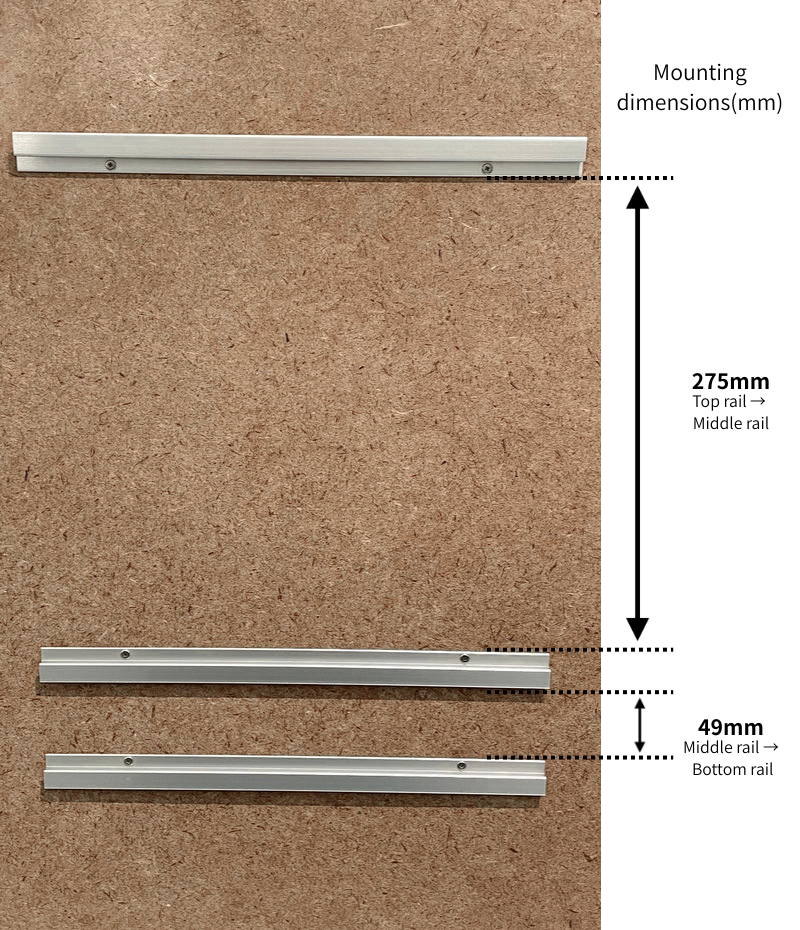
There are 3 tiers of rails from top to bottom (Top, Middle, and Bottom).
Spacing between rails:
* Top rail ➔ Middle rail: 275 mm
* Middle rail ➔ Bottom rail: 49 mm
Mark the position for each rail while checking that it is level using a spirit level (level).
Please pay close attention to the direction of the rails (the direction of the protruding lip).
*Note: The "lip" refers to the protruding edge on one side of the rail.
* Top Rail: Lip facing "downward"
* Middle Rail: Lip facing "upward"
* Bottom Rail: Lip facing "upward"
[When using screws]
Secure using the included rail mounting screws.
[When using double-sided tape + adhesive]
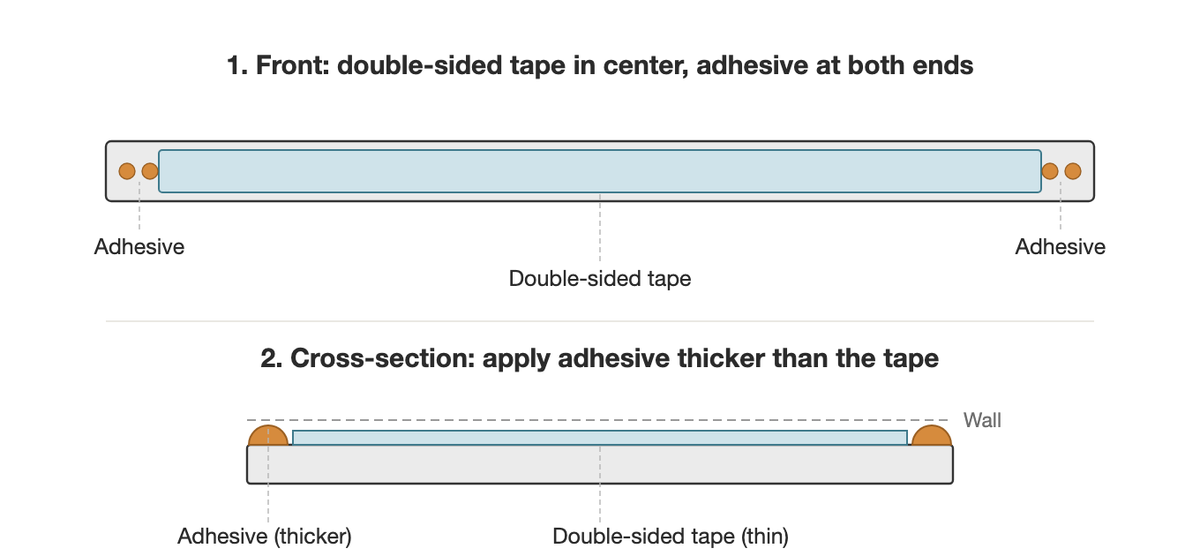
Apply one strip of the included double-sided tape down the center of the rail, then apply the adhesive in several dots along both sides of the tape.
Apply the adhesive dots slightly thicker than the double-sided tape so they rise above it.
2. Secure the 3 rails to the wall (Screws or Double-sided Tape + Adhesive)
(Ensure correct positioning: Top Rail = Lip facing downward / Middle Rail = Lip facing upward / Bottom Rail = Lip facing upward)
* Top Rail: Lip facing "downward"* Middle Rail: Lip facing "upward"* Bottom Rail: Lip facing "upward"
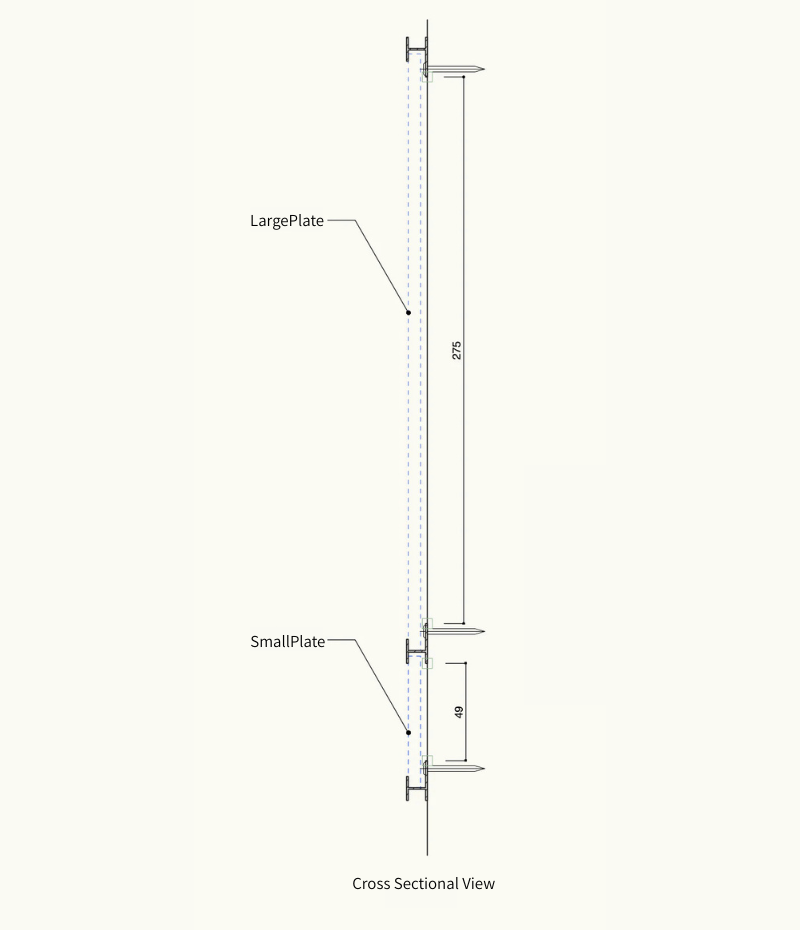
3. Attach the plates to the rails
Insert the Large Plate (Logo) and Small Plate (OPEN / CLOSE) into the rails.
4. Switching between OPEN and CLOSE
The Small Plate features double-sided printing. You can switch the display between OPEN ⇄ CLOSE simply by flipping the plate over.