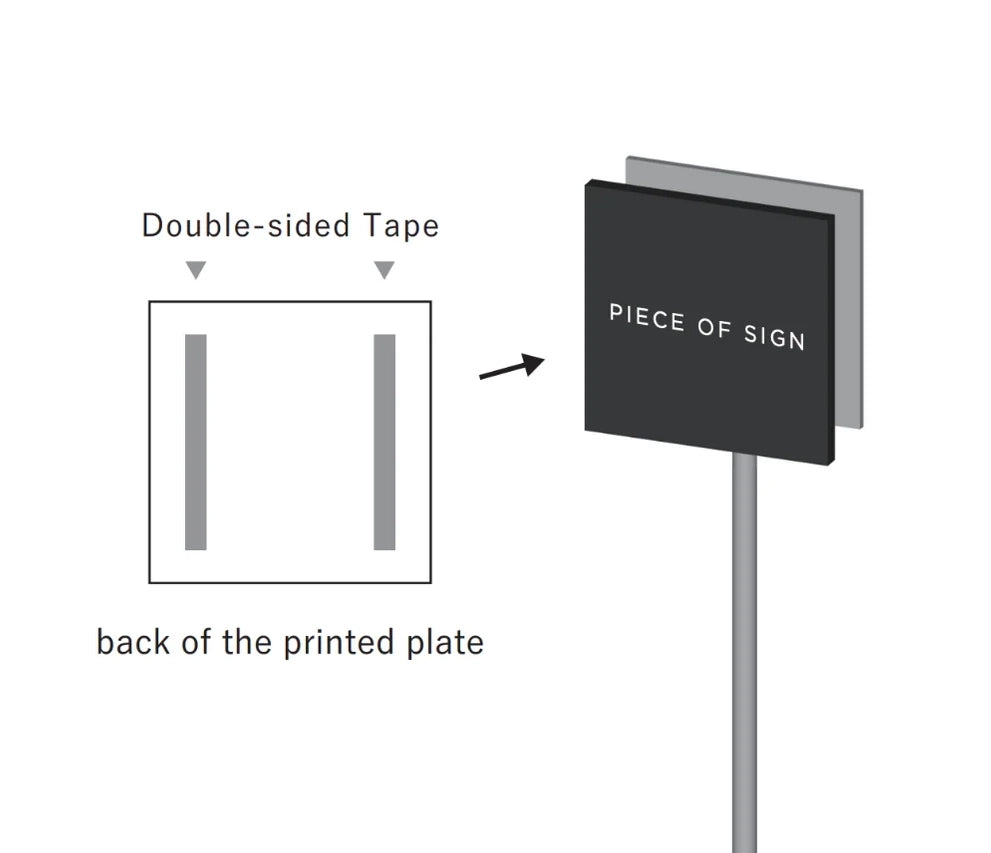

pole sign assembly

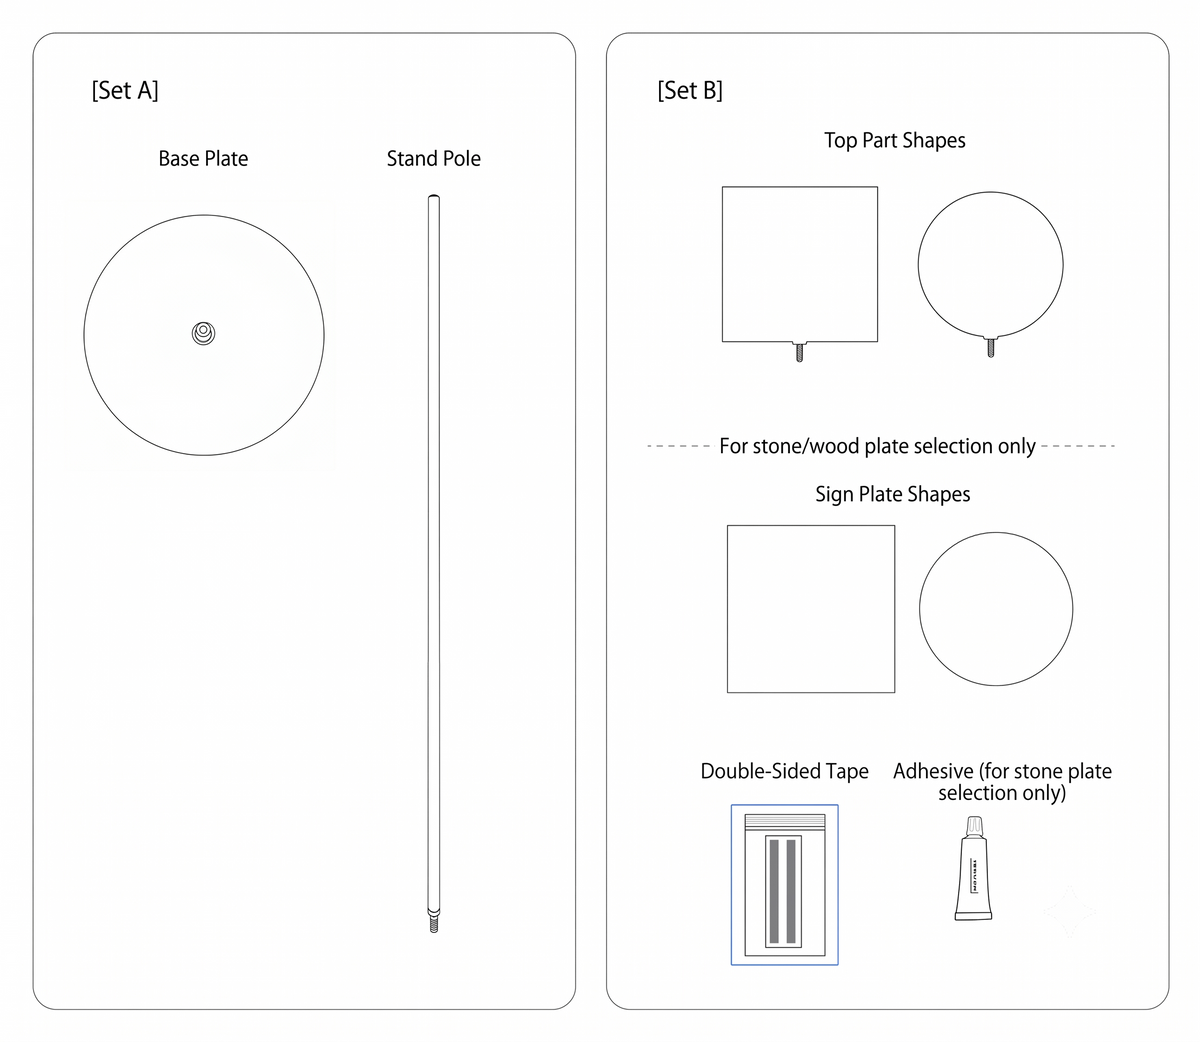
Included Items
[Set A]
- Base Plate
- Stand Pole
[Set B]
- Top Part
- Sign Plate
- Double-Sided Tape
- Adhesive (Included only if the stone sign plate option was selected.)
⚠️ Notes
- Once applied, the double-sided tape cannot be repositioned. Make sure the placement is correct before applying it.
- Check the bolts regularly for looseness and retighten them if necessary.
- To help prevent the sign from tipping over, always place it on a flat, stable surface.
Assembly Instructions
[Attach the Sign Plate]
- Apply the double-sided tape to the back of the sign plate (see illustration below), then remove the release liner.
If you selected the Stone Sign Plate, also apply the included adhesive. - Align the sign plate with the front of the top part and attach it. Press firmly to ensure proper adhesion. If using adhesive, take care not to let the sign plate shift until the adhesive has fully cured.
[Assemble the Stand]
- Screw the stand pole firmly into the threaded hole in the center of the base plate.
- Align the top part with the threaded end of the stand pole, then rotate it until fully tightened. Assembly is now complete.