

TABLE LED BOX SIGN
⚠️ Usage & Installation Precautions
- Suitable for outdoor use, but please be mindful of weather conditions and the installation environment.
- Please prepare a USB charger (Type-A compatible, 5V) yourself to charge the included rechargeable LED light.
- The rechargeable LED light is covered by a 1-year warranty from the date of delivery.
- Due to ongoing product improvements, the design of the rechargeable LED light may vary slightly depending on the manufacturing batch (this does not affect functionality or performance).
- A full charge provides approximately 8 hours of continuous illumination, though this may vary depending on the selected lighting mode, battery condition, and capacity.
- Due to the natural characteristics of the materials used for the top plate (natural wood, metal, natural stone), individual variations in color, wood grain, or patterns, as well as aging over time (such as rusting or discoloration), may occur.
■ Package Contents
This product is delivered in two separate packages.
▼ Set 1 (Main Body Package)
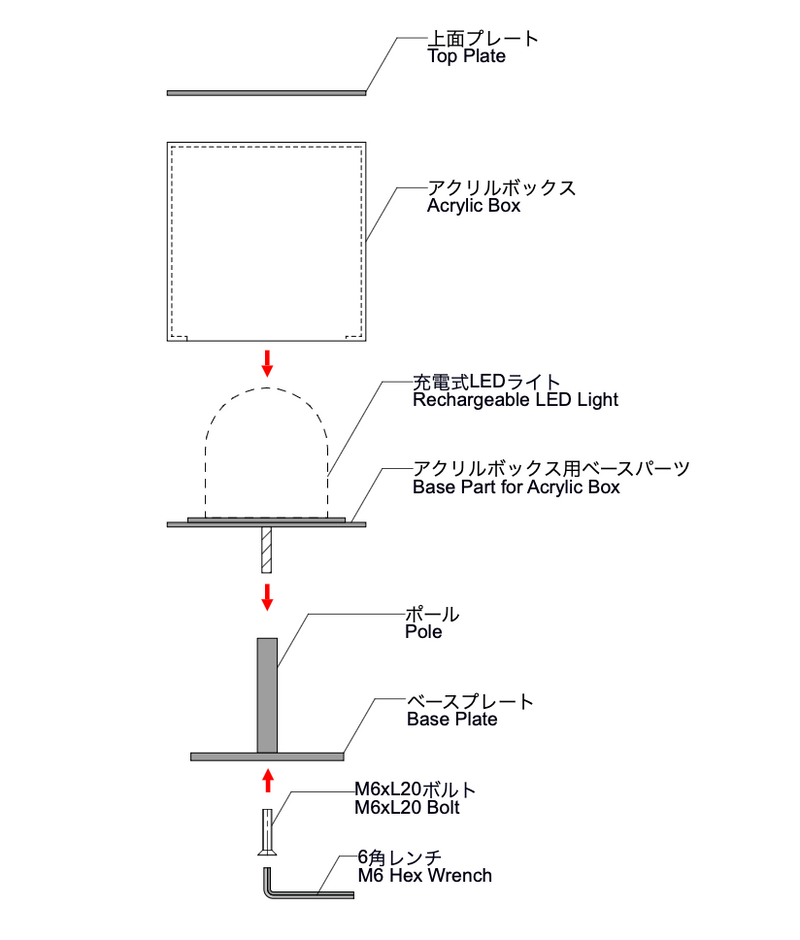
- Acrylic Box × 1
- Base Part for Acrylic Box × 1
- Pole × 1
- Base Plate × 1
- M6xL20 Bolt × 1
- M6 Hex Wrench × 1
▼ Set 2 (Plate & Lighting Package)
- Top Plate (130 mm Square) × 1
- Rechargeable LED Light × 1
- USB Charging Cable × 1
- Double-Sided Adhesive Tape for Top Plate × 2 strips
- Apply the Transfer Decals(*Included only if custom printing was specified)
■ Assembly Instructions
1. Assemble the Main Stand
Using the M6 hex wrench, secure the base plate to the bottom of the pole with the M6xL20 bolt.
Screw the threaded stud located in the center of the acrylic box base part into the female thread at the top of the pole to secure it firmly.
2. Set the LED Light
Place the rechargeable LED light in the center of the acrylic box base part.
3. Attach the Top Plate and Position the Box
Apply the included double-sided tape strips to the top plate, then press it firmly onto the top surface of the acrylic box to bond them securely.
Place the acrylic box onto the acrylic box base part.
4. Adjust Lighting and Dimming
Press the switch on the rechargeable LED light to select your preferred lighting mode (Warm / White / Daylight)
and adjust the brightness (stepless dimming) as desired.
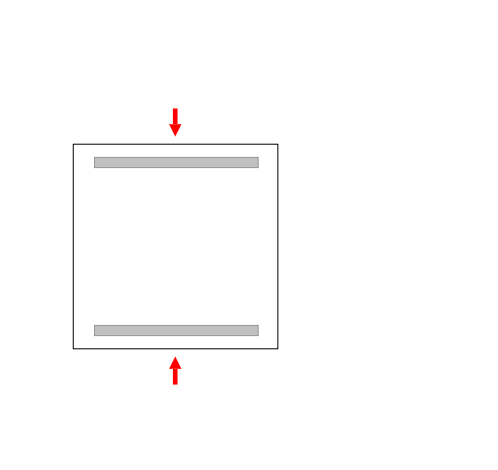
Double-sided tape on the top plate