
THE DOOR PLATE - COLOR
⚠️ Usage & Installation Precautions
- The included double-sided tape and adhesive cannot provide sufficient bonding strength on the following wall surfaces or materials. Please inspect and verify your wall surface prior to installation:
【Surfaces where the included tape and adhesive cannot bond】
・Textured, rough, or curved wall surfaces
・Easily damageable surfaces (such as wallpaper) or surfaces with peeling paint
・Hard-to-bond materials, including
・PVC (polyvinyl chloride), rubber, polypropylene, and polyethyleneSurfaces with fluorine or silicone coatings
・Concrete or plaster/stucco walls - Please use masking tape to temporarily hold the parts in place until the adhesive cures completely (approx. 24 hours).
(Do not use heavy-duty painter's tape or duct tape). - When applying temporary masking tape, ensure it does not overlap with any printed text or graphics on the plate surface.
Peeling off tape from printed areas may damage or peel away the print. - Once the adhesive is fully cured, removing the sign from the wall surface becomes extremely difficult.
Please confirm and finalize your installation location before beginning work.
■ Package Contents
Set 1 and Set 2 are delivered in separate packages.
▼ Set 1
- Aluminum L-Angle Bracket (Mounting bracket / ordered size) × 1
▼ Set 2
- Acrylic Plate (Ordered size) × 1
- Double-Sided Adhesive Tape: White × 2 strips, Red × 2 strips
- Adhesive (Tube) × 1 tube
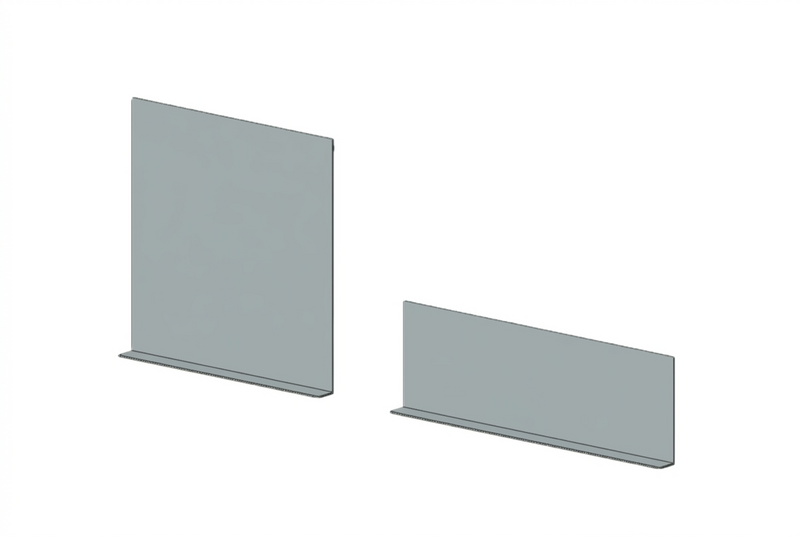
Set 1
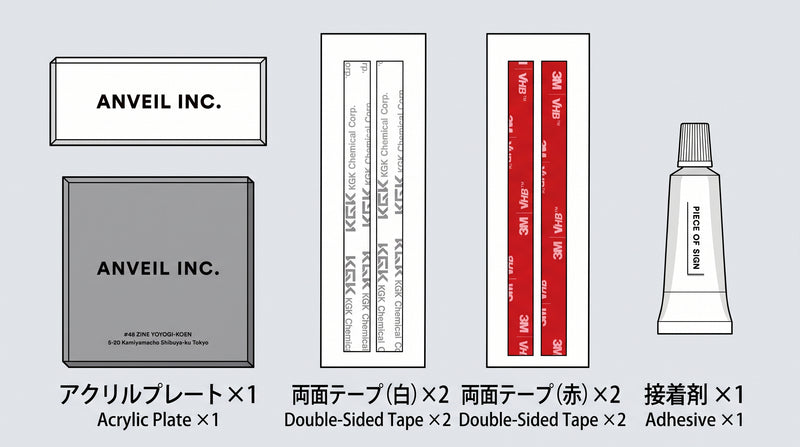
Set 2
■ Assembly & Installation Instructions
⚠️ To prevent the sign from falling, always use both the double-sided tape and the adhesive together.
1. Clean the Mounting Surface
Wipe away any oil, moisture, dust, or dirt from the installation wall surface using a soft cloth or rag, and allow it to dry thoroughly.
*Although workable in low-temperature conditions, we recommend carrying out the bonding process at an ambient temperature of 15°C (59°F) or higher.
2. Mount the Acrylic Plate to the L-Angle Bracket
① With the release paper still attached, apply the double-sided tape strips (white) evenly along the inner mounting surface of the L-angle bracket.
② Apply half of the adhesive in dots across at least 4 locations, applying them slightly thicker than the double-sided tape so they rise above it.
③ Peel off the release paper, align the acrylic plate, and press it firmly against the bracket for approximately 30 seconds to bond.
*The adhesive takes approximately 24 hours to fully cure; temporarily hold the plate in place with masking tape during this time.
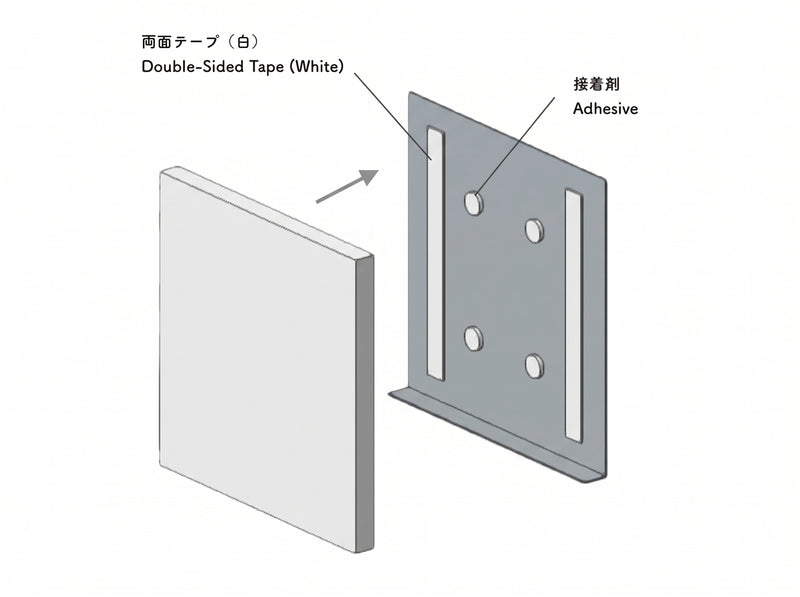
Square
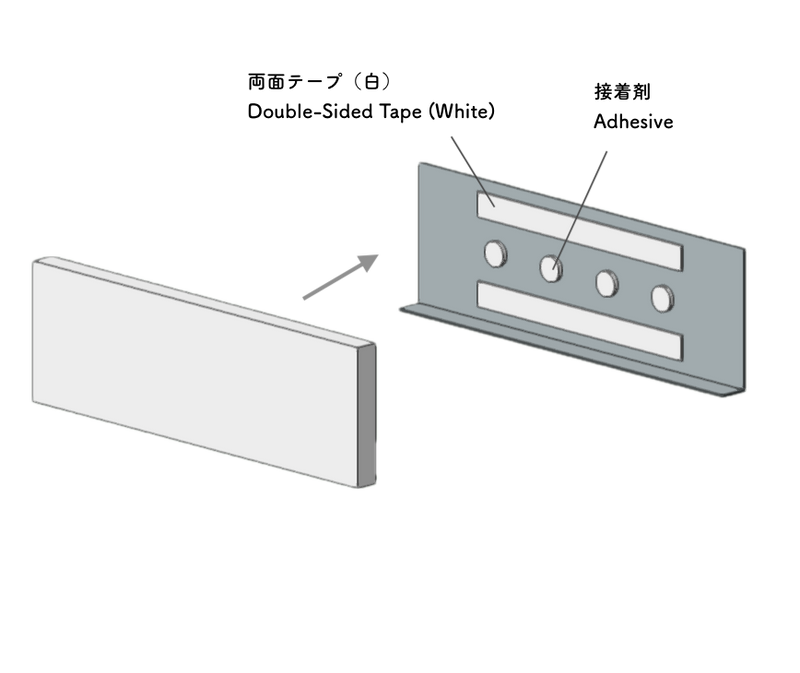
Rectangle
3. Mount the L-Angle Bracket to the Wall
① Apply the double-sided tape strips (red) to the back of the L-angle bracket (the metal surface contacting the wall).
② Apply the remaining half of the adhesive in dots across at least 4 locations, applying them slightly thicker than the double-sided tape so they rise above it.
③ Peel off the release paper, align the unit with the wall, and press it firmly against the wall surface for approximately 30 seconds to bond.
*The adhesive takes approximately 24 hours to fully cure; temporarily hold the bracket in place with masking tape during this time.
④ Once fully cured, gently remove the temporary masking tape.
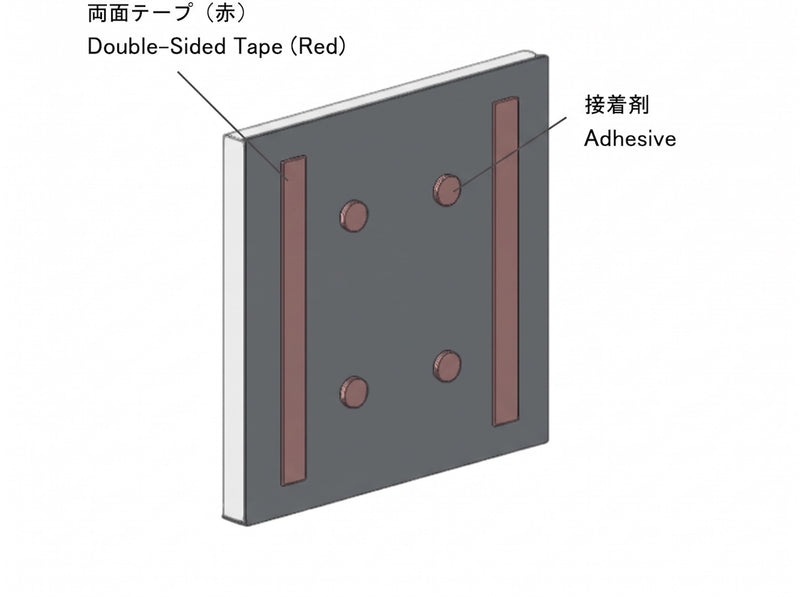
Square
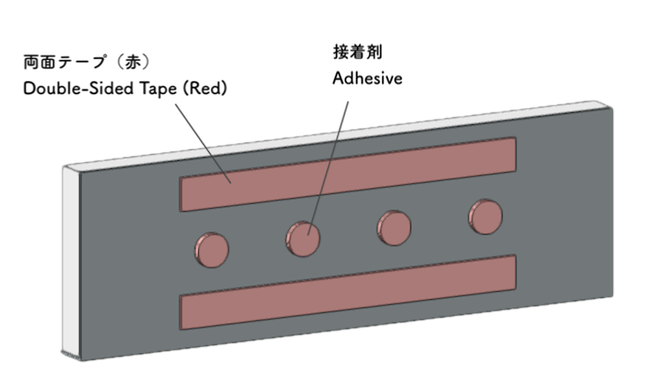
Rectangle