
Acrylic Poster Stand Sign A2
⚠️ Usage & Installation Precautions
- Suitable for outdoor use.
- The included wall-mounting screws (M4 × L50) are for wood substrates only.
If installing on other substrates such as light gauge steel (LGS) framing, concrete, or exterior walls,
please source appropriate screws or anchors suitable for your wall material separately on site. - The main unit weighs approximately 6 kg. To prevent falling when wall-mounting, avoid installing directly onto drywall (gypsum board) alone;
always anchor securely into solid backing behind the wall using suitable screws or anchors.
■ Package Contents
- Steel Plate (Main Signboard) × 1
- Acrylic Plate (Clear Poster Protection Sheet) × 1
- Round Bar (Freestanding Stand Leg) × 1
- Rubber Tape (25 mm W × 420 mm L) × 1 strip
- Wall-Mount Screws (M4 × L50 Tapping Screws / Wood Substrates Only) × 2
■ Assembly & Installation Instructions
Follow the instructions below for either Freestanding Setup or Wall-Mount Installation, depending on your preferred style.
【Freestanding Setup】
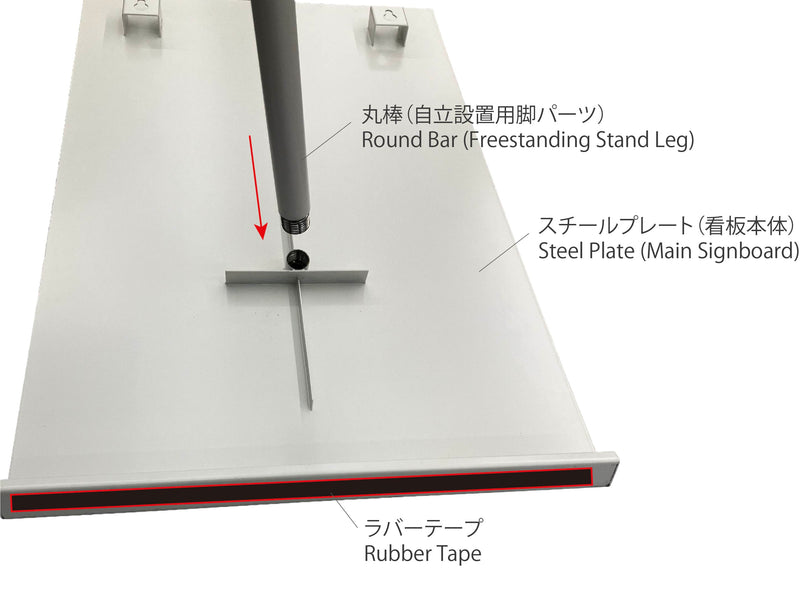
1. Apply the Rubber Tape
Peel off the red backing paper from the rubber tape and attach it firmly along the bottom edge (the surface resting on the ground)
of the steel plate (main signboard).
2. Attach the Round Bar
Screw the round bar into the mounting hole located at the bottom center on the back of the steel plate (main signboard) until secured tightly.
The round bar acts as a kickstand to allow the sign to stand on its own.
3. Insert the Poster
Place your poster on the surface of the steel plate, then cover it with the acrylic plate to sandwich the poster in place.
*Note: For outdoor use, we recommend using a laminated poster for water resistance.
【Wall-Mount Installation】
1. Drive the Screws
Locate the wooden backing behind the wall.
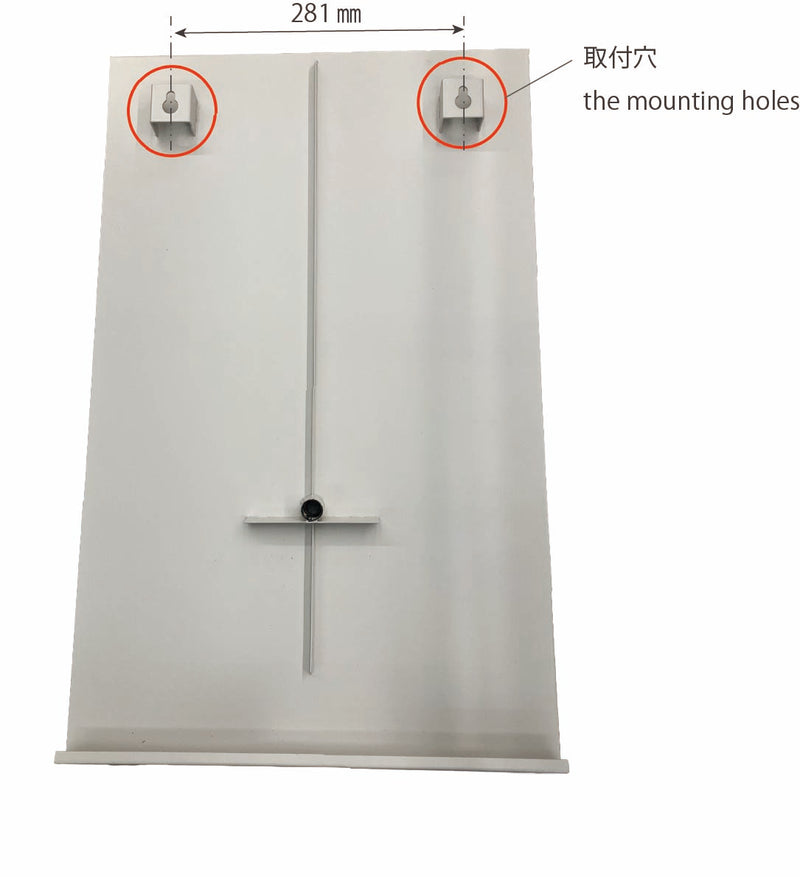
Drill pilot holes into the wall corresponding to the mounting hole spacing on the back of the steel plate (main signboard) (refer to the diagram below),
then drive in the two wall-mounting screws.
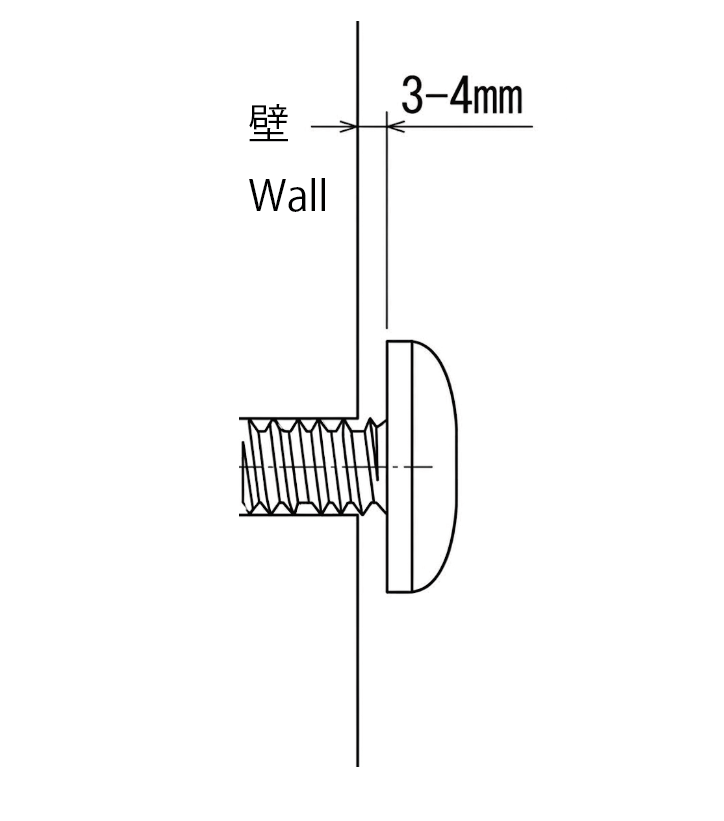
Adjust Screw Clearance:
To allow the signboard to hook onto the wall, adjust the screw depth to leave a 3–4 mm gap (head clearance)
between the screw head and the wall surface.
2. Insert the Poster
Position your poster against the steel plate (main signboard) and place the acrylic plate over it to hold it in place.
*Note: For outdoor use, we recommend using a laminated poster for water resistance.
3. Mount the Signboard to the Wall
Pass the heads of the screws through the wide sections of the mounting holes on the upper back of the steel plate (main signboard),
then slowly slide the unit downward to securely hook it in place.
After mounting, gently pull the signboard forward to verify that it does not wobble or slip off the screws.