FOLDING A-FRAME stand sign

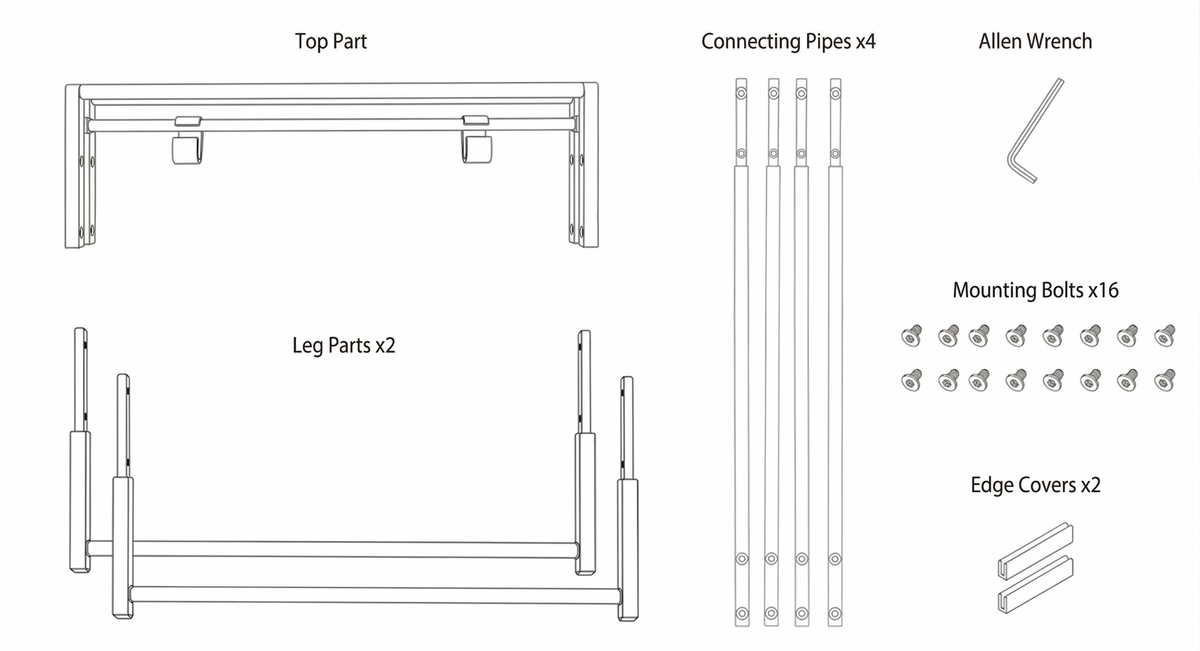
Included Items
- Top Part
- Leg Parts x2
- Connecting Pipes x4
- Allen Wrench
- Mounting Bolts x16
- Edge Covers x2 (for sign plate)
- Sign Plate (shipped separately)
Assembly Instructions
Assemble the unit on a flat, stable surface.
Step 1:
Insert the Connecting Pipes into the four corners of the Top Part (with screw holes facing inward) and secure them loosely using the Mounting Bolts.
Note: Do not tighten the bolts fully at this stage. Tighten them just enough to hold the parts in place.
Step 2:
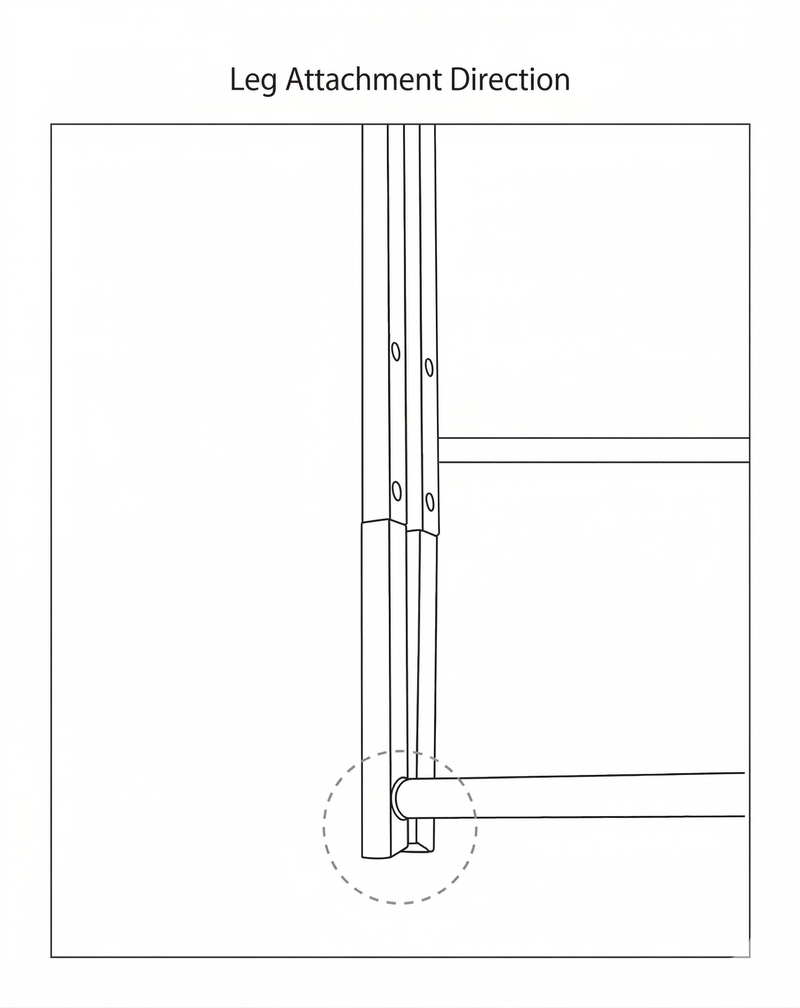
Attach the Leg Parts to the four Connecting Pipes.
Each leg has an angled base.Make sure the screw holes face inward as shown in the diagram below.
Step 3:
Check that all parts are correctly aligned and assembled. Then, use the Allen Wrench to firmly tighten all the bolts.
Step 4:
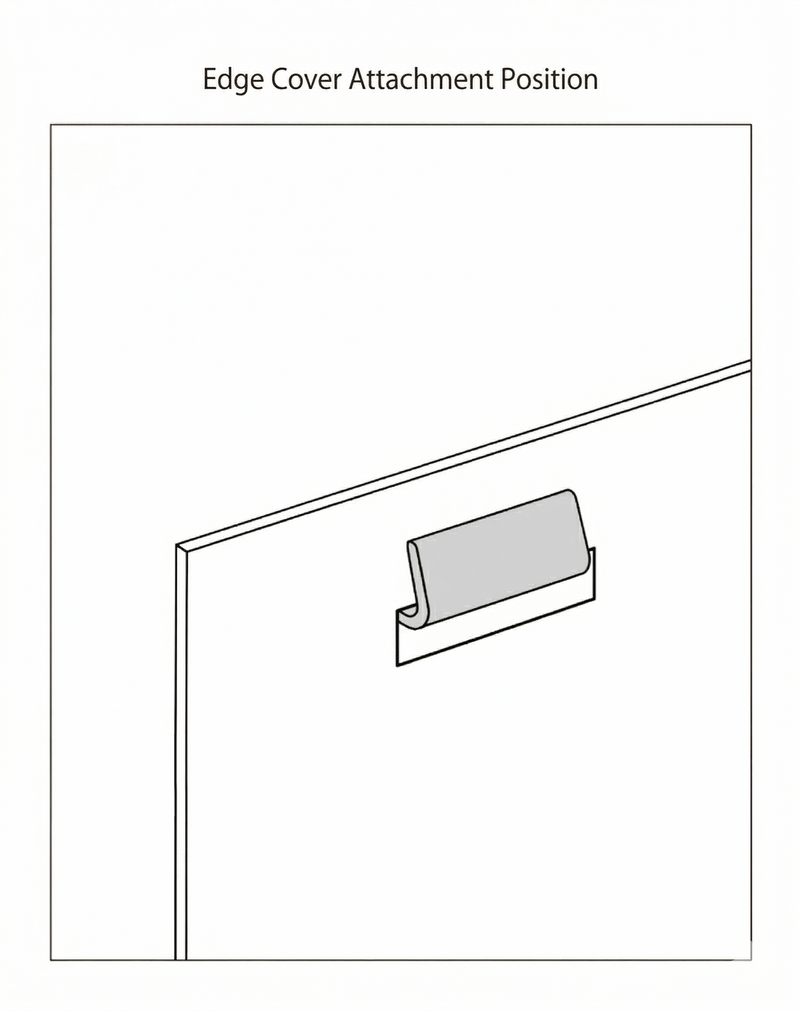
Attach the protective Edge Covers to the top edges of the two holes on the Sign Plate. (See diagram below)
Step 5:
Hang the Sign Plate onto the hooks of the main frame. The hooks are pivoting; please adjust the position as needed so that the plate hangs straight down.
⚠️ CAUTION
Loose bolts can cause the unit to tip over or warp. Periodically inspect the bolts and retighten them if they become loose.