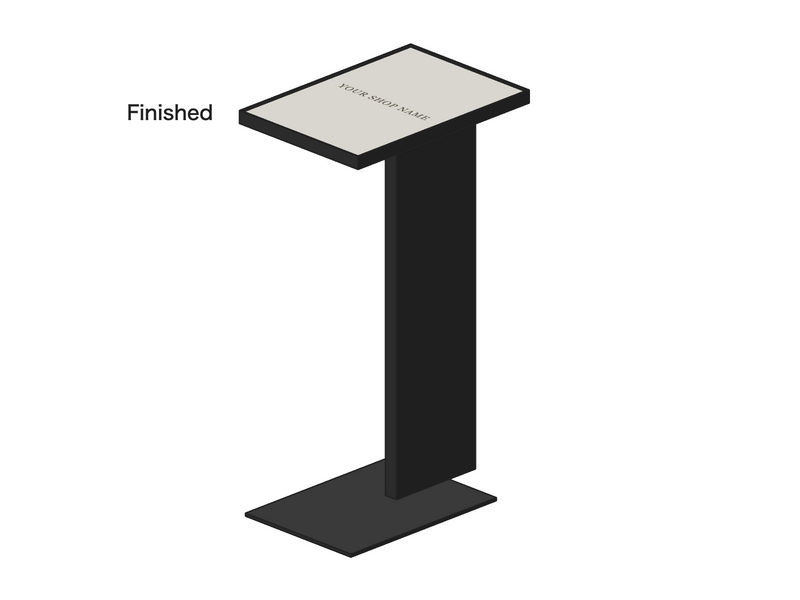

SQUARE CUSTOM SIDE TABLE

Before Use
• Load capacity (evenly distributed): approx. 10 kg (22 lb).
• Do not lean on the table to stand up, and do not put excessive weight on only the front edge of the top.
Because of its structure, heavy loads on the front may cause the table to tip over.
• Do not place anything on the top for 24 hours after assembly, until the tape has fully bonded.
⚠️ Precautions for Applying Double-Sided Tape and Mounting Pads
• Apply Firm Pressure: Apply firm, even pressure across the surface after placement (pressure-sensitive adhesive).
• 24-Hour Bonding Period: It takes approximately 24 hours for the tape to achieve its full bonding strength.
• Non-Repositionable: Once applied, the tape cannot be repositioned. Peeling it off will compromise its adhesive performance.
• Low-Temperature Sensitivity: In cold environments, the adhesive tape may not achieve its optimal bonding strength. When installing in low temperatures, gently warm the tape with a hair dryer before application.
Package Contents
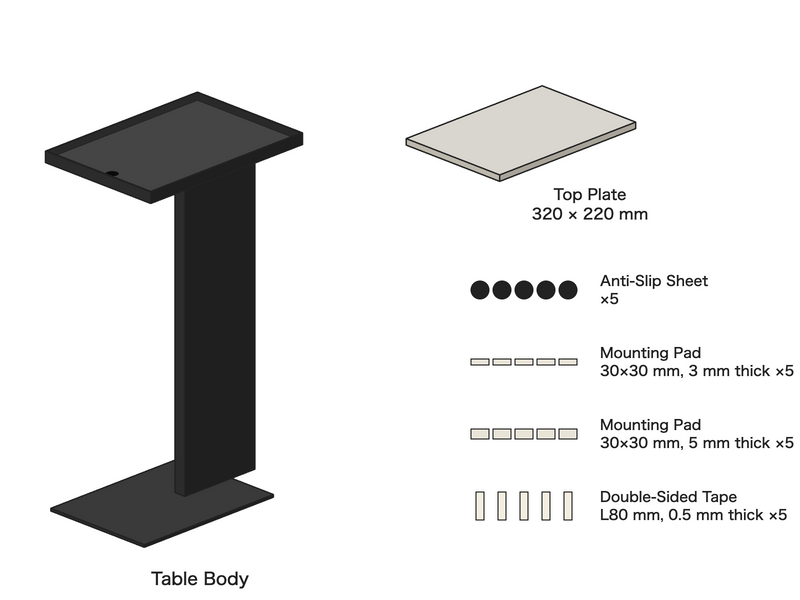
• Table Body ×1
• Top Plate (320 × 220 mm) ×1 (shipped separately from the body)
• Anti-Slip Sheet ×5
• Mounting Pad (thick double-sided tape) 30 × 30 mm, 3 mm thick ×5
• Mounting Pad (thick double-sided tape) 30 × 30 mm, 5 mm thick ×5
• Double-Sided Tape L80 mm, 0.5 mm thick ×5
*The items you use depend on the top plate material.
• Glass (6 mm thick): 5 mounting pads, 5 mm thick
• Stone (13 mm thick): 5 strips of double-sided tape, 0.5 mm thick
• Wood (10 mm thick): 5 mounting pads, 3 mm thick
Keep any unused items as spares.
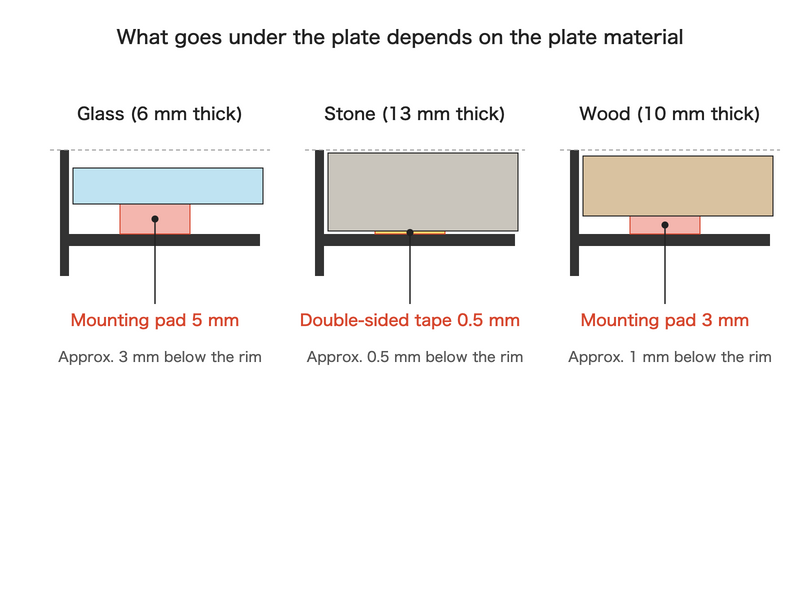
Use the items that match your top plate material.
Assembly Instructions
① Lay the table on its side and apply the 5 anti-slip sheets to the underside of the base plate, at the four corners and in the center.
Then stand the table on a flat floor.
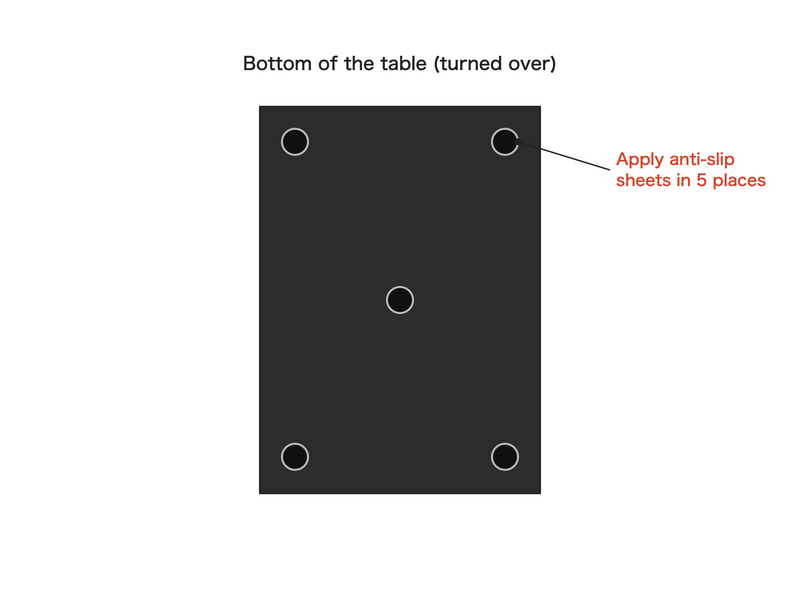
Apply the anti-slip sheets to the underside of the base plate.
② Wipe any dust or dirt from the tray on top (where the plate sits) with a dry cloth.
③ Choose the mounting pads or double-sided tape that match your top plate material. Peel the liner from one side and apply them to the bottom of the tray in 5 places: the four corners and the center.
*Do not cover the hole (Ø20 mm) in the tray.
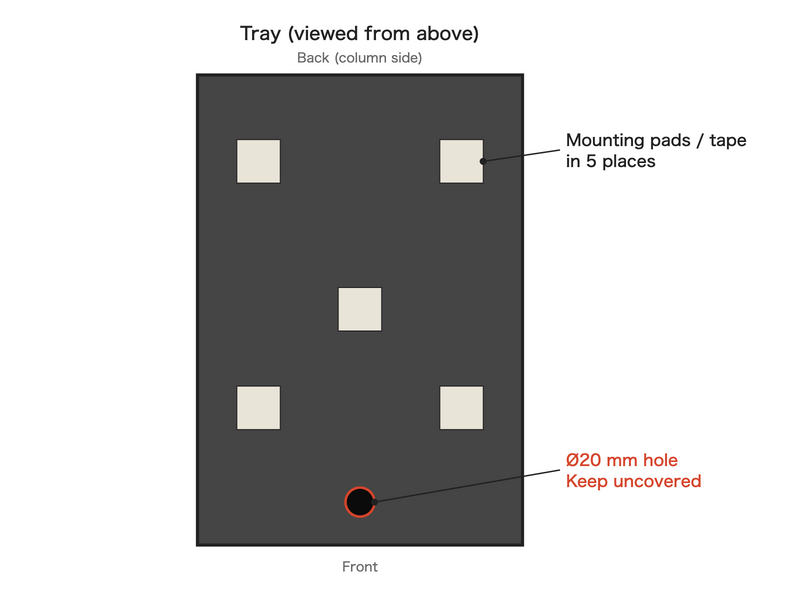
Apply in 5 places on the bottom of the tray.
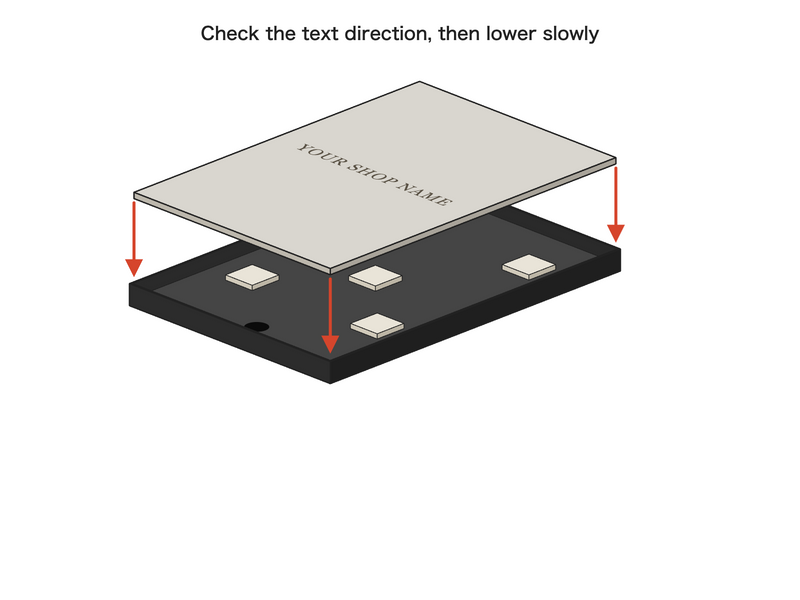
Peel off the top liner and check the text direction before placing the plate.
④ Peel off the top liners. Check the orientation of the plate (the direction of the text), then slowly lower the plate into the tray.
*The plate cannot be repositioned once placed. Check the orientation carefully before setting it down.
⑤ Press firmly over the entire plate by hand to bond the tape. Assembly is complete.
*It takes approximately 24 hours for the tape to reach full bonding strength.